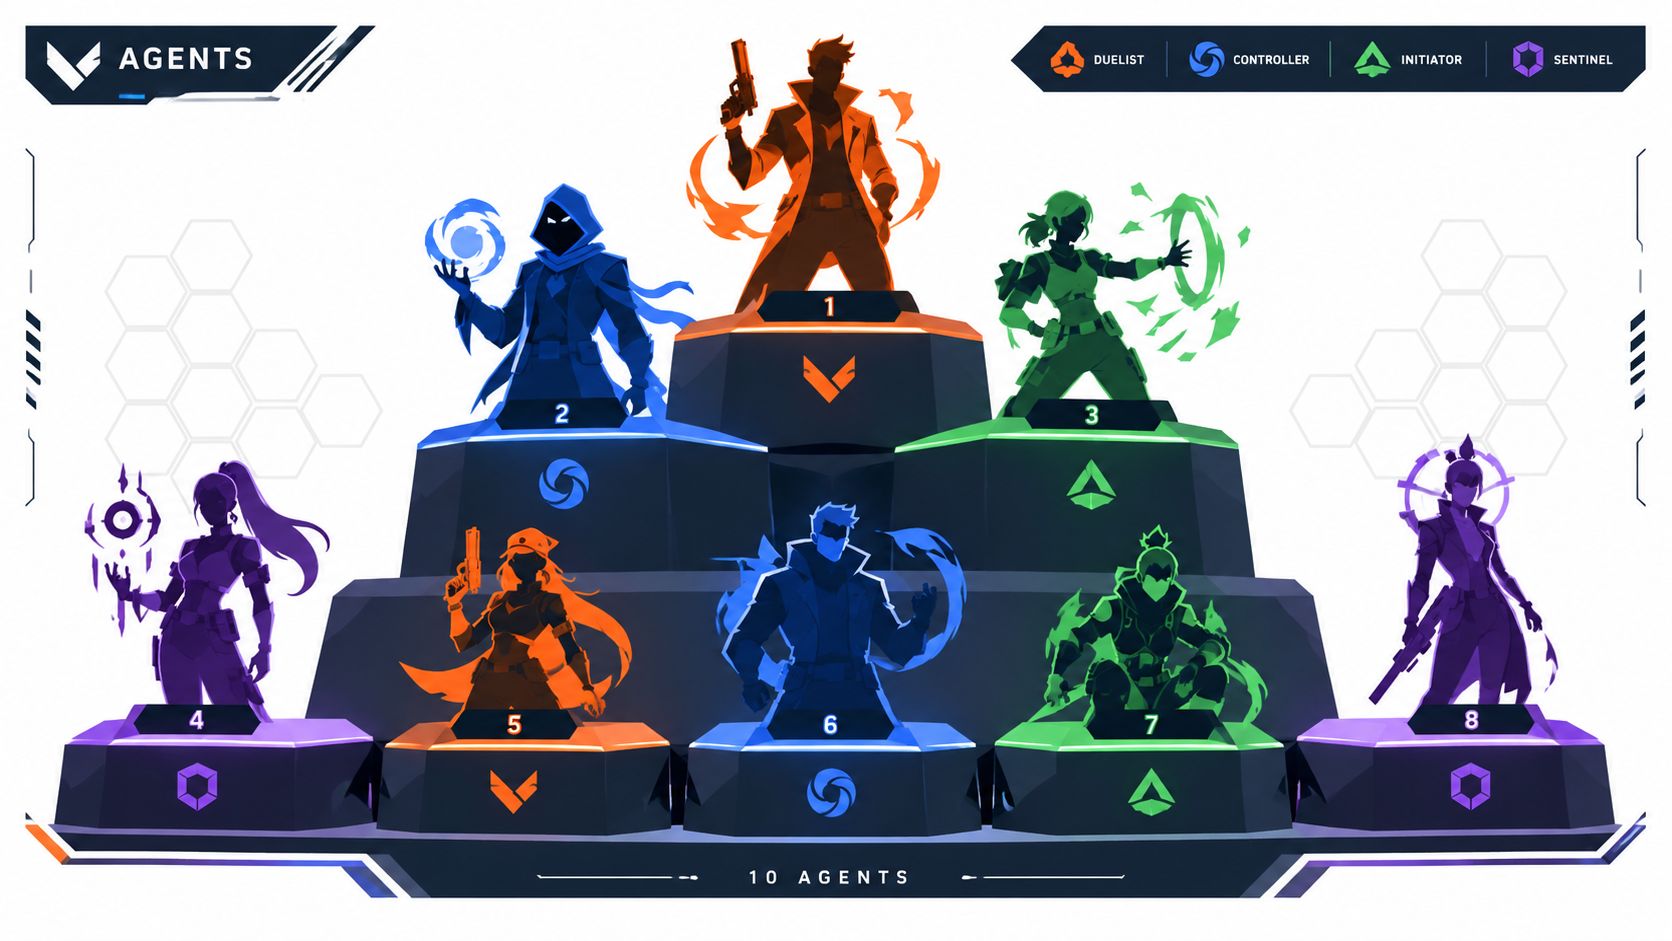
The best agent isn't the one sitting at the top of a universal chart. It's the one that solves the round your team is most likely to lose. A mobility duelist can be the correct pick on a map built around aggressive space-taking, then become a poor choice when nobody can provide utility for the entry. A defensive sentinel can dominate a slow site pattern but offer little when your team needs immediate pressure.
This VALORANT tier list ranks ten agents by practical competitive value, not raw popularity. The lens is role impact, map interaction, utility reliability, coordination demand, and solo-queue usefulness. Current trackers also show why popularity alone can mislead. Clove leads one large dataset at a 55.02% win rate across 3,192,183 matches, while Sage records 53.23% across 2,221,358 matches, demonstrating that meaningful rankings need both performance and sample size. (Liquipedia's VALORANT statistics)
Use these rankings as a pick framework, not a replacement for reading your composition. Your job is to identify the missing function, then choose the agent whose tools you can execute under pressure.
Table of Contents
- 1. Jett, the Duelist Playmaker
- 2. Sage, the Sentinel Anchor
- 3. Chamber, the Sentinel Operator
- 4. Omen, the Controller Ghost
- 5. Raze, the Duelist Aggressive Initiator
- 6. KAY/O, the Initiator Suppressor
- 7. Breach, the Initiator Wall-Breaker
- 8. Killjoy, the Sentinel Tech Master
- 9. Phoenix, the Duelist Aggressive Self-Sufficient
- 10. Cypher, the Sentinel Information Master
- Top 10 Valorant Agents: Tier Comparison
- Build Around Your Win Condition, Not the Tier Label
1. Jett, the Duelist Playmaker
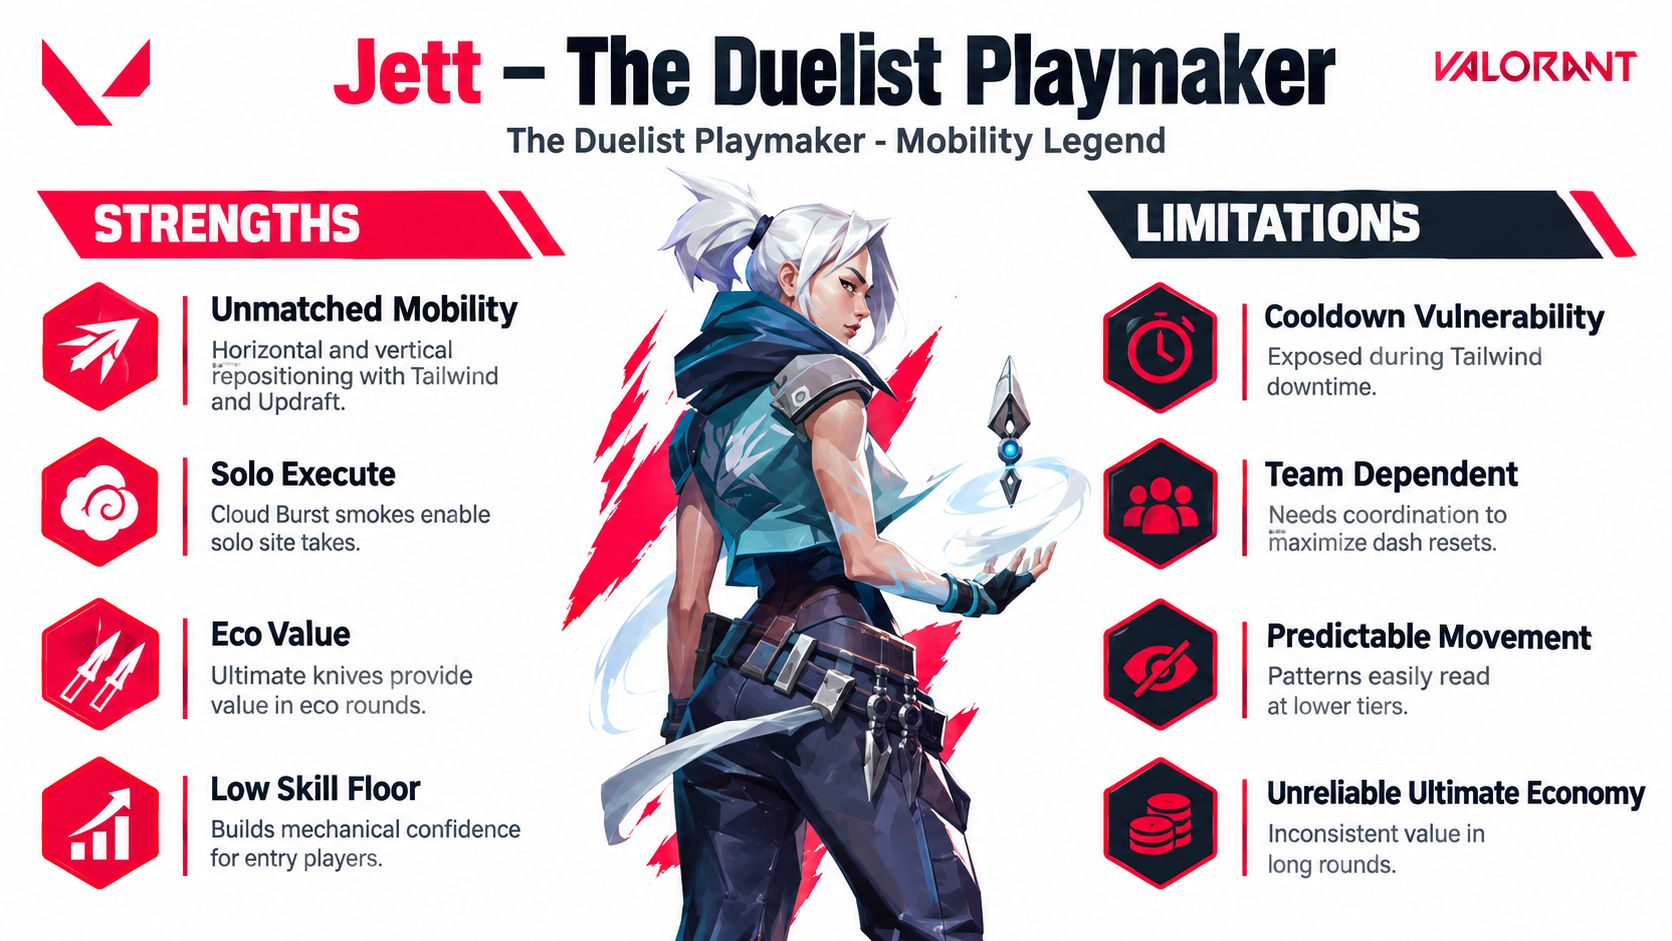
Jett deserves the top slot because practical competitive value often comes from creating space before a defense can stabilize. Her dash lets her challenge an angle, force a response, and leave before opponents secure a clean trade. Updraft adds vertical routes that disrupt familiar crosshair placement on maps with boxes, ledges, and raised platforms.
Her ranking rises when teammates can provide flashes, recon, or smokes before contact. With coordinated utility, Jett can take the first duel while teammates follow through the opening. Her value drops when the player hunts kills instead of territory, or when the composition lacks a controller who can cover the angles she must cross.
Execution determines whether that mobility produces pressure or merely movement. Tailwind should support a planned escape, not a speculative peek without follow-up. Updraft should create a specific angle, route, or timing advantage.
Make mobility serve the round
Bind and Ascent show why map geometry changes Jett's value. Bind's compact sites reward sudden elevation changes and fast space-taking. Ascent gives her long sightlines where a dash can deny an Operator a clean punish. Her pick rises further when the team can convert that first opening into a plant or immediate trade.
Practical rule: Keep the dash for the moment after contact unless the entry plan specifically requires it before the fight.
Popularity alone does not justify a high ranking. MetaBot's current agent data places highly picked agents such as Jett below some less-selected alternatives in win-rate efficiency, reinforcing that her ceiling depends on execution rather than recognition. (MetaBot's VALORANT agent data)
Players refining ranked fundamentals can apply these ranked gameplay improvement tips to Jett's demanding role. Bind Tailwind to a comfortable movement key, practice air-strafing, and preserve the escape for post-plant repositioning when each surviving player has greater round value.
2. Sage, the Sentinel Anchor
Sage earns this ranking through round control, not popularity. She can restore health, slow an entry, reshape a choke with her wall, and revive a teammate when the numbers still support a recovery. Her impact remains high even when she never takes first contact.
Her strongest rounds are built around time. On defense, a wall can delay a hit until support arrives. On attack, it can protect a plant, divide a dangerous angle, or create a temporary platform that changes the defenders' clear. Blocking a doorway is rarely the only option. An offset wall can force opponents into exposed positions while they destroy it.
Sage rises in compositions that lack resilience or a reliable post-plant plan. She falls when the team already has overlapping defensive utility and needs another initiator. Her execution also matters. Healing the player most likely to win the next duel usually creates more value than treating the ability as a personal reset.
The anchor's economy value
Sage's utility can preserve weapons, health, and player numbers through several stages of a round. A slow orb can disrupt an economy-round rush, while a wall can delay a plant or force opponents to spend utility before they reach the site.
Her resurrection rewards planning before the casualty occurs. Play near safe recovery space, remain available after the frontline makes contact, and avoid becoming the first target because you hold the ultimate. A revive that restores a strong weapon, a key role, or site control can change the round's economy and tactical options.
Sage's statistical profile supports her practical consistency. A large Season 26 Act 5 dataset records a 53.23% win rate over 2,221,358 matches, placing her behind Clove but ahead of many popular comfort picks, according to VStats data published through Liquipedia. The result does not make her the correct choice on every map. It does show why she belongs high on a practical valorant tier list: she supplies structure without requiring perfect coordination, while her value rises further when teammates can convert delays, healing, and resurrection into controlled fights.

3. Chamber, the Sentinel Operator
Chamber earns practical value through controlled risk. His teleport supports aggressive long-range holds, while his trap monitors a flank or rotation path. With his custom weapon available, he can contest sightlines that another Sentinel might have to concede. That makes him a strong pick for teams that want early pressure without giving up a defensive role.
His value depends heavily on opening-duel execution. A player who can win or threaten first contact turns Rendezvous into a repeatable escape and repositioning tool. A predictable Operator angle produces the opposite result, since the teleport becomes an expensive retreat rather than a method of controlling space. Chamber also offers less passive site denial than Killjoy, so the team must assign stall and post-plant duties elsewhere.
Trap placement should follow opponent movement, not habit. A device on a common site entrance may be destroyed before it provides information. A rotational path often creates more value by revealing how defenders respond. That information helps Chamber choose among holding the angle, repositioning, or applying pressure in another lane.
Aggression without isolation
Chamber's first contact works best when teammates can support it. A flash or smoke can reduce the chance of an immediate trade, while pressure on another part of the map can delay the collapse onto his position. After a kill or forced displacement, teleporting to a fresh angle usually creates more value than waiting for the same duel.
His custom weapon ultimate should serve a specific round plan. It can support a force round, hold a narrow sightline, or let the team spend credits on other utility. Using it without a clear reason to contest space wastes the advantage that separates Chamber from more passive Sentinels.
The broader VALORANT game ecosystem shows why Chamber belongs high on a practical tier list only in the right hands. He rewards confident mechanics, but team value comes from communicating trap information and making teleport locations predictable to allies, not opponents. Map geometry, economy, and composition determine whether his aggression becomes control or isolated risk.
4. Omen, the Controller Ghost
Omen earns practical value through timing rather than raw pick rate. His smokes support entry and retake plans, Paranoia removes a defensive angle, and Shrouded Step lets him change the geometry of a fight. That flexibility keeps him useful even when teammates do not execute a perfect plan.
He rises on maps with layered routes, long rotations, and repeated timing windows. Regenerating smoke access can cover the initial hit, then return for post-plant pressure or a retake. Paranoia gains the most value through a choke, where it forces defenders to retreat or fight while impaired.
His ranking falls when utility is spent automatically. A smoke placed before teammates can use it may give defenders time to spray, reposition, or wait out its timing. Saving one charge to block a retake crossfire can matter more than supporting the first step of an execute.
Shrouded Step demands the same discipline. Teleporting into an uncleared pocket turns a flexible tool into an isolated death. Use it after information, pressure, or teammate contact has reduced the number of angles that can punish the arrival.
Build smokes around decisions
Place smokes shortly before the team acts. On attack, that timing limits the defender's opportunity to adapt. On defense or during a retake, pair Paranoia with a coordinated swing so the affected players cannot wait behind cover.
Omen's ultimate should create uncertainty, not chase a highlight. A safe information teleport can reveal defensive positions, while a relocation can preserve pressure after opponents commit resources to another part of the map. Its value depends on the round state, available credits, and whether teammates can exploit the information.
Omen also fits solo queue because his utility remains useful without elaborate choreography. He is a practical choice when the team needs controller coverage and the player's strengths are timing, map reading, and adaptive decision-making. He falls behind more specialized picks when the composition already supplies reliable smokes or when the player cannot convert Paranoia into space. In a practical tier list, his position therefore rises with map complexity and execution quality, rather than popularity alone.
5. Raze, the Duelist Aggressive Initiator
Raze turns utility into entry momentum. Her explosives clear corners, punish stacked positions, and force defenders away from the areas where they want to fight. Satchels add speed and vertical movement, but her real competitive value comes from making close spaces unsafe before the duel begins.
She rises on maps with tight chokepoints, layered corners, and defensible pockets that can't be cleared efficiently with ordinary gunfire. Her grenades can remove a hiding place before entry, and her ultimate can stop a defuse or break a site hold at the moment opponents expect to stabilize.
Raze falls when the player treats satchels as a movement trick instead of a timing tool. A fast leap without teammate support often creates an isolated fight. She also needs a team that can capitalize on the displacement her utility creates. If nobody follows the cleared space, defenders reclaim it.
Trade explosive utility for territory
Use the cluster grenade before entering a dangerous room, not after you've already exposed yourself. The first explosion should make the defender move, and your rifle should punish the movement. Satchel routes deserve practice because inconsistent activation turns a planned entry into noise.
Entry rule: Clear the corner, force the displacement, then arrive while the defender is still choosing a new position.
Raze is also more forgiving than a pure aim duel when the player understands geometry. A grenade can deny a plant area, pressure a close angle, or make an economy round uncomfortable without requiring a perfect headshot. Her Showstopper should serve a decisive objective, such as site entry or stopping a defuse attempt, rather than being fired whenever it becomes available.
6. KAY/O, the Initiator Suppressor
KAY/O earns his place by attacking the opponent's ability to execute their own plan. Suppression can disable the defensive tools that make an entry difficult, while flashes create the timing window for teammates to take space. His fragment grenade adds a second layer by clearing common hiding positions and discouraging static holds.
He rises against compositions that rely on layered abilities. If Killjoy, Cypher, Sage, or another controller is protecting the same choke, KAY/O can remove the setup before the duel begins. His value is highest when teammates know the exact moment suppression lands and swing immediately.
He falls in quiet rounds where nobody acts on the information. A suppression knife that reveals enemies but receives no follow-up may only tell the team what it already suspected. His flashes can also punish teammates when thrown without a clear line or timing, so communication matters more than raw ability count.
Make suppression actionable
Pair the suppression effect with a flash or a prepared swing. The goal isn't merely to disable abilities. It's to create a brief period in which the opponent can't rely on the tools they selected for that position.
Use the fragment grenade before entry to clear a corner, then preserve the ultimate for a round where stopping defensive utility or disrupting a post-plant defuse changes the outcome. Call the throw timing verbally in a stack, especially when the team's duelist needs to move as soon as the knife connects.
For players preparing a coordinated roster, competitive-play preparation advice is directly relevant to KAY/O's demands. He's much stronger when teammates understand utility timing, trade distance, and the difference between information and an actual green light to push.
7. Breach, the Initiator Wall-Breaker
Breach is a composition pick, not a default comfort pick. His flashes and concussion effects can pass through walls, giving him a way to create entry windows where ordinary sightline utility would struggle. Aftershock clears stubborn corners, while Rolling Thunder can remove defenders from an entire site or make a retake impossible to hold comfortably.
He rises on structured executes with a duelist who understands timing. Breach should not flash because the team is nearby. He should flash because the entry player is ready to move through the resulting gap. A pre-fire immediately after detonation can punish defenders who stay in common positions, while concussion can disrupt a rifle holder before the first duel.
His value falls in scattered solo-queue attacks. If teammates peek before the flash, ignore the stun, or enter through a different lane, Breach has spent his strongest resource without changing the fight. He also offers less independent information than KAY/O, so the composition should include another way to confirm where opponents are playing.
Geometry determines his tier
Walls are Breach's advantage. Narrow lanes and deep defensive pockets give his abilities more reliable targets, while open areas reduce the number of positions he can affect at once. His aftershock should clear corners that would otherwise force a teammate into a blind fight, not land in the center of a site.
On defense, concussion can interrupt a retake attempt or make a defuse position dangerous. Rolling Thunder is most valuable when it supports a specific swing, plant, or retake route. Without a player ready to capitalize, the ultimate becomes displacement without conversion.
Breach belongs above agents with higher solo carry appeal when the lobby has communication and a plan. In an uncoordinated match, his ranking drops sharply because his best utility has a short window and demands immediate action.
8. Killjoy, the Sentinel Tech Master
Killjoy controls territory with devices that keep working while she watches another angle. Her turret can reveal pressure, Alarmbot can punish a rotation, and her defensive setup creates a cost for opponents who want to rush through a site. Lockdown adds a powerful way to force defenders or attackers out of a planted area when the team has time to protect the device.
She rises on maps where a team can hold a site with layered zones rather than constant aim duels. Her utility is particularly valuable when the team needs one player to watch flank pressure while the rest of the group contests another lane. She also creates strong post-plant situations when the team can defend the ultimate's placement and delay the defuse window.
Killjoy falls when the enemy can break her setup before it matters or when the map forces constant repositioning. Her devices don't follow her, so a player who abandons the defended area too often loses much of the kit's value. That makes her less flexible than Chamber and less information-rich than Cypher.
Passive tools still need active thinking
Place the turret where it can see useful movement, including surfaces that make it harder to ignore. Alarmbot often provides more value on a rotation route than directly at the site entrance, because a late flank can decide a round after the initial defense has already fallen.
Lockdown shouldn't be treated as an automatic site-entry button. Its strongest use often comes after the spike is planted, when opponents must either give up the defuse area or spend utility and time destroying it. Protect the device with crossfire or denial tools, otherwise the ultimate only announces a target.
Broader tracking has shown that low pick rate can hide strong performance in specific conditions. In one August 2026 snapshot, Killjoy posted a 54.4% win rate while her pick rate stayed around 1%, a combination that demands caution rather than immediate dismissal. (Hotspawn's VALORANT agent tier-list coverage) The sample is context-sensitive, but it supports the practical conclusion: a quiet pick can be excellent when the map and setup suit it.
9. Phoenix, the Duelist Aggressive Self-Sufficient
Phoenix is built for players who want to create their own fight. His flashes can open close angles, his fire controls space, and his ultimate lets him gather information or take a dangerous duel without putting the round's full economy at risk. That self-sufficiency makes him useful when teammates aren't providing reliable entry support.
He rises in solo queue when the player can recognize isolated defenders and create pressure without waiting for a perfect call. Run It Back is especially valuable for testing a site, forcing opponents to reveal positions, or taking first contact before the hit. His fire also helps him recover between fights and control areas that would otherwise require a controller's support.
Phoenix falls when his flashes blind teammates or when the ultimate starts without a clear return path. He also competes for the same entry space as other duelists, so pairing him with Raze or Jett requires a deliberate division of responsibilities rather than two players chasing the first kill.
Self-sufficiency still needs timing
Throw a curveball shortly before the peek, so the flash and swing arrive as one action. A molly can deny an off-angle before the execute, but placing it too early may let defenders wait and re-enter the space after it fades.
Use the ultimate for information and pressure, not only for kills. A returned Phoenix can still deliver value by revealing the opponent's setup, forcing utility, or making defenders give up a key angle. Heal proactively when the area is safe, because entering the next fight already damaged reduces the advantage his kit is designed to create.
Phoenix is a good example of why a flat list can mislead. His value depends less on universal strength than on whether the player can manufacture favorable fights and communicate the timing of the push after the ultimate ends.
10. Cypher, the Sentinel Information Master
Cypher closes the list because his value is enormous but demanding. Cameras, tripwires, and cages can expose routes, punish careless movement, and turn a retake into a controlled information problem. He doesn't need to stand on the site every second to influence it, which lets a patient player manage the whole round.
He rises on maps with meaningful flank routes, repeatable chokepoints, and defensive positions where information remains useful after the first contact. A camera placed in an awkward off-angle can force opponents to spend utility before they enter, while a trapwire can identify whether a rotation is real or a fake.
Cypher falls when the player repeats the same setup. Once opponents know where the camera and wires are, they can clear them efficiently or use them to manipulate the defender. He also requires clear communication. Information that stays in your head has no team value.
Convert information into action
Place cameras where destroying them costs time or utility. Use cages to create imperfect cover rather than filling a doorway, because a well-timed gap can force opponents to commit while you hold the better angle.
His ultimate is strongest when the team already understands what it wants to do with the reveal. A location call should trigger a rotate, a pinch, or a prepared retake swing. Otherwise, the scan becomes a short-lived burst of knowledge with no pressure behind it.
Cypher's high skill ceiling explains why he can feel weak in one player's hands and oppressive in another's. His kit rewards adaptation, route prediction, and concise calls. Pick him when you want to win through information and preparation, not when the team needs immediate entry or emergency smokes.
Top 10 Valorant Agents: Tier Comparison
| Agent (Role) | 🔄 Implementation Complexity | ⚡ Resource Requirements | 📊 Expected Outcomes | 💡 Ideal Use Cases | ⭐ Key Advantages |
|---|---|---|---|---|---|
| Jett (Duelist) | Moderate 🔄, low skill floor, high mechanical ceiling | Low ⚡, self-sufficient, variable ultimate economy | 📊 High entry pressure; first-frag potential | 💡 Double-duelist comps, aggressive early rounds, eco knife plays | ⭐ Mobility (dash/updraft), solo executes, strong fragging |
| Sage (Sentinel) | Low–Moderate 🔄, timing and positioning focused | Moderate ⚡, wall/res cooldowns, close-proximity heals | 📊 Strong sustain and round-extension via res | 💡 Defensive anchors, post-plant stalls, anti-aggression holds | ⭐ Healing, resurrection, area control (wall/slow) |
| Chamber (Sentinel) | Moderate 🔄, trap/teleport timing, Operator positioning | High ⚡, expensive setup, relies on weapon economy | 📊 High pick/deny potential at long range | 💡 Operator-focused strategies, solo anchoring, long-range control | ⭐ Teleport anchoring, traps for info/damage, Operator synergy |
| Omen (Controller) | Moderate–High 🔄, predictive smoke timing and coordination | Moderate ⚡, versatile with modest setup | 📊 Flexible site control and map pressure | 💡 Smoke-stack executes, post-plant stalls, flex support | ⭐ Long-range smokes, paranoia for disruption, strategic teleports |
| Raze (Duelist/Initiator) | High 🔄, satchel/rocket timing and high mechanical skill | Moderate ⚡, explosive utility costs, close-range focus | 📊 Strong room-clearing and area denial | 💡 Vertical site executes, eco pressure, aggressive entry plays | ⭐ Explosive utility, guaranteed-damage ultimate, vertical play |
| KAY/O (Initiator) | Moderate 🔄, suppression and flash timing critical | Moderate ⚡, coordinated use; ult risky during activation | 📊 Neutralizes enemy utility, enables decisive executes | 💡 Anti-ability comps, aggressive full executes, anti-sentinel builds | ⭐ Ability suppression, strong flash/frag synergy |
| Breach (Initiator) | Moderate 🔄, wall-proxied abilities require setup | Moderate ⚡, needs team follow-up; slow ultimate charge | 📊 Reliable guaranteed-entry windows and site clears | 💡 Wall-heavy maps, structured executes, retake setups | ⭐ Wall-piercing flashes, concussions, area-flushing ultimate |
| Killjoy (Sentinel) | Low–Moderate 🔄, placement planning; passive execution | Moderate ⚡, device setup time and placement cost | 📊 Excellent area control and post-plant denial | 💡 Passive defense, information-focused holds, post-plant anchoring | ⭐ Autonomous devices, strong intel, lockdown ultimate |
| Phoenix (Duelist) | Low–Moderate 🔄, timing for heals/flashes, forgiving play | Low ⚡, self-sustaining utility reduces team resource need | 📊 Reliable solo aggression and sustain in trades | 💡 Solo-queue entry fragging, self-sufficient plays, early-round aggression | ⭐ Self-heal, reliable flashes, area control with molly |
| Cypher (Sentinel) | High 🔄, high skill ceiling for camera/trap placement | Low–Moderate ⚡, low-cost gadgets but setup-dependent | 📊 Exceptional intel and retake-readiness | 💡 Information-focused defense, post-plant retakes, anti-eco pressure | ⭐ Spy camera, traps for guaranteed info, reveal ultimate |
Build Around Your Win Condition, Not the Tier Label
A useful VALORANT tier list should narrow your decision, not make it for you. Start by asking what the team can't currently do. If nobody can take first contact, choose a duelist whose movement or explosive utility creates space. If the team has damage but no safe entry, add an initiator who can clear the angle. If the composition can fight but can't control sightlines, the controller becomes the priority.
Map geometry comes next. Tight lanes favor utility that clears corners and forces displacement. Long sightlines reward agents who can contest distance or deny vision. Rotational maps increase the value of information, traps, and flexible smoke timing. A pick that looks average in a global ranking can become the best choice when its utility interacts with the actual paths defenders and attackers must use.
Execution should decide close calls. Jett and Chamber offer high individual agency, but their value drops if the player can't convert first contact or disengage reliably. Breach and KAY/O can create stronger team fights, but only when teammates act on suppression, flashes, and stuns. Killjoy and Cypher can lock down a plan, but they need setup discipline and useful communication.
The available data supports this context-first approach. Rank distribution is concentrated below high elo, with Silver 1 at 9.06%, Gold 1 at 8.81%, and Radiant at 0.05% of reported players, so recommendations should serve the large Silver to Platinum population rather than only top-level outliers. (Esports Tales' VALORANT rank and agent data) Those players often need reliable, repeatable value more than a theoretically perfect professional composition.
Use this quick selection process before locking in:
- Entry: Pick Jett or Raze when the team needs someone to take space and survive the first contact.
- Smokes: Choose Omen when the team needs flexible control and you're comfortable managing timing across the round.
- Suppression: Select KAY/O when enemy abilities are the main reason your entries stall.
- Wall-breaking: Pick Breach when teammates are ready to follow flashes, stuns, and wall-clearing utility immediately.
- Anchoring: Use Sage or Killjoy when the round plan depends on delay, recovery, or protected post-plant space.
- Information: Choose Cypher when flank control and predictable routes matter more than raw entry speed.
The final question is social, not mechanical. Can you find teammates who communicate at the pace your agent requires? A Breach player needs a duelist who listens. A Cypher player needs teammates who react to calls. A Jett player needs support utility and trade discipline. Building around those relationships can improve your practical options more than swapping between two agents separated by a small statistical margin.
GamerPlug helps players search for compatible VALORANT teammates through profiles, gameplay clips, verified ranks, play-style details, and looking-for-group tools. Instead of judging a teammate from a username alone, you can look for players whose communication habits, schedule, and competitive goals fit the agent and round structure you play.
GamerPlug is a free teammate-finding app for players who want better matches than random queue can provide, with profiles built around clips, verified ranks, play style, mic use, and schedule. Use its LFG tools to find VALORANT teammates who fit your role and communication style, then visit Gamerplug to start building a squad that can turn smart tier-list picks into coordinated wins.